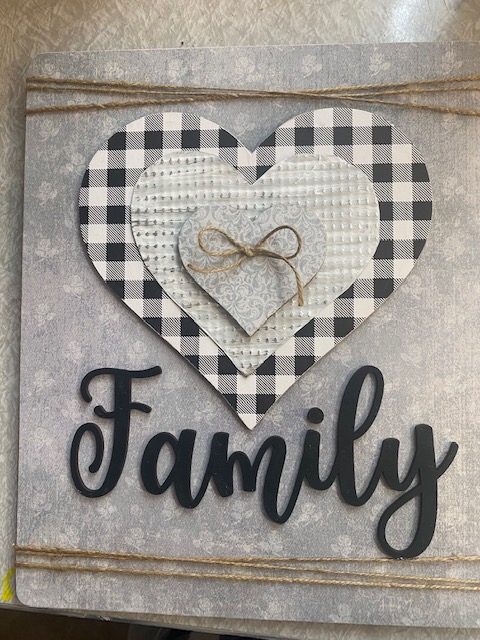


I don’t know about you but I love my family more than anything else on earth! Why not make a beautiful sign to show them? The beauty of this kit is that you can make it as Valentine decor or as a year around decor.
Supplies needed:
- Family Heart Craft Kit from our wood shop
- Twine
- Scrapbook paper
- Mod Podge
- Glue Gun
- Paint
- Sanding Block
- Hammer

Family Heart Kit


Our Family Heart kit can be decorated for va…
First you will need to trace your backer board and the wooden hearts onto the scrapbook paper of your choice. Cut them each out and apply Mod Podge to the front of wood pieces (the adhesive backing is on the back of the hearts). You want to make sure it is covered well but does not have puddles of Mod Podge. Once you have the Mod Podge on, place the cut out scrapbook paper on top of it. Take a scrapper and smooth out any air bubbles. If you don’t have a scrapper, you can use an old credit card. I like to take a sanding block and go over all the edges to remove any excess scrapbook paper. Be sure you sand down, never up or you will tear your paper.


Next, cut the heart out of the tin. Paint it a color of your choosing. I painted mine white and once it dried, I lightly sanded it with the sanding block just to give it a little more texture.


Now it’s time to paint the word “Family”. I find the easiest way to paint small pieces is to to take a makeup sponge and dab it on. It covers well and doesn’t get on the side of the word as a paint brush would.


Now that we have all the pieces finished, let’s put it all together. First, start with the large heart and flip it over and use your scrapper to make sure the adhesive backing is pressed down well. Then take the backing off to expose the adhesive. Position the large heart about an inch and a half from the top of your backer board. You want to make sure you have room for the word Family at the bottom. Once you have the large heart placed, put some hot glue on the back of the foil heart and place in the center of the large heart. Be careful as the tin heart will get very hot. I like to use the mask applicator from dollar tree to push it down and not get burned. Take the small heart, use the scrapper on the back like you did on the large, remove the backing to expose the adhesive and center in the tin heart. Then take the backing of the word family and place that below the hearts.


The next step is optional. I wrapped twine around the top and bottom. To do this, I put a bead of hot glue on the back and wrapped the twine around it three times and pushed it into the bead of hot glue on the back. I add some more hot glue and used the mask applicator to smooth it out to make sure the twine was stuck down well. I did this same process on the top and bottom.


I then took the last small rectangle wood piece and put that on the back in the top center. I then put the saw tooth hanger on top of that.

The last step is to tie a small bow with the twine and put in the center of the small heart. I really think this adds just the right amount of sweetness to finish this project off. You can order this kit by following the link below.
Happy Crafting,
Kathy
Family Heart Kit
Our Family Heart kit can be decorated for va…